Pages

Wednesday, May 16, 2018

WHO DID THIS??


It's a classic move, drawing a mustache/goatee on a picture. This particular instance of it is famous, though, not just because it was done on the Mona Lisa, but because of the artist who did it.

FOR EXTRA CREDIT...


Find out the following, and turn in (hand!) to me:

1. The name of the artist (not DaVinci)
2. The title of the artwork (not, "Mona Lisa")
3. What that title could possibly mean...
4. Two interesting facts about the artist/this artwork

This needs to be HANDWRITTEN on a piece of paper, to get credit

WHEN/IF YOU FIND OUT, DON'T TELL YOUR FRIENDS!! 
(If they want extra credit, they can do the work themselves :)

EXTRA CREDIT OPTION DUE by Friday, May 18th (not valid for extra credit after this date!!)

Thursday, March 22, 2018

FINAL PRODUCT! Rationale, instructions, ideas, and BRAINSTORMING!

As you know, YOU get to choose what you want to do for your final (aka last) projects in screen printing. Because these items will be something you are producing (and will be more than one thing), we are calling this your 
'FINAL PRODUCT'

Last Friday, I showed you the new techniques/inks of PLASTIPUFF, HEAT TRANSFERS, and FABRIC FOIL TRANSFERS, and then talked about how you will get to choose what you want to do for your last projects. I explained that it will work this way:

* to fulfill the final project requirement, there will be a certain amount of points you'll need to earn 

(example: 200 points)

* You will be given a chart with point values for each type of product/project, and then will make sure that what you choose to do, adds up to that (200) total. 

(example: a one-color shirt might equal 50 pts. Printing ten copies of that shirt could earn you 5 more points per shirt. Then you might choose to also do a two-color poster for another 75 pts, etc)

(*note*-- these are not THE point values, don't plan on them like this, it's just an example!!)

* to then EARN those points, you just have to do the work to the best of your ability! If you don't do it or are late on it, obviously that changes the point value. The intent, though, is that you are choosing to do things you WANT to do... and if you want to do them, you'll want to do them well! So, you should naturally do your best on them! And at the end of all this-- you'll have some awesome screen printing products, AND a good grade! Win-win! :)

You will be given the point value chart as the next step in the process. For now, though...


BRAINSTORM!!!
As in, think of what you want to do! And while you're doing that, dream big! Don't limit yourself to what you've already done or already know how to do, and definitely don't think small in terms of how much you can do! True, I might reign you in and let you know that, no, you won't be able to print 1,000 3-color shirts. But now is not the time for restrictions-- think about ALL that you MIGHT want to do!

First, to assist you in this, think of what you're doing along these terms:

1. this is a FINAL PROJECT - It should be a test of your skills, abilities, etc, pushing you a little farther, AND be something you want to create! Also needs to be ORIGINAL, you're not just copying something that has already been done... (make it YOURS)

2. it's not just called your "Final Product"; your idea can also be intended as a PRODUCT... as in, making more than one item. That might mean you will print numerous copies of the same (example: a bunch of the same shirt--10 2-color shirts for a club or a family vacation; or 30 a limited edition art print), or a series of something (example: notecards in five designs; a t-shirt design that has a logo that is also printed as a sticker; etc)

I realize at the brainstorming phase... you might be stuck! Drawing a blank for ideas! Need reminders about the kinds of things you CAN make for this project! Hoping for some inspiration!

SO

Second, to assist you, here are some:


IDEAS OF THINGS YOU CAN DO

You may only think screenprinting is for tshirts and self-portraits... wrong! :) 

There are many types of fabric and paper substrates, and many ways to print on them! (example: make your own wrapping paper!) And then there are other substrates you may not have ever thought of... (example: print on wood and then build something out of it!)

(*following are IDEAS, for inspiration... NOT TO COPY. Your product should never be a copy of someone else's design! -but inspiration is good! And this list is not the end-all, either!)

HERE YOU GO...

(and be sure to click "read more" when you get to the "bottom" of this page...)


aprons


a good "product" could be an apron... PLUS recipe cards...

art prints--
do you draw? make multiple prints of one of your sketches/drawings! 


you could do multiple colors, or add foil to one part!

Thursday, February 8, 2018

SOUP CANS and COLOR SCHEMES

 READ ALL THE WAY TO THE END OF   THIS POST!!!

Friday and Monday (2/9 and 2//12), you will create your own "Campbell's soup can" in the style and theory of Andy Warhol... but instead of Campbell's soup, you will create a can of something else relevant to contemporary society and/or important to you!

Then, you will COLOR each can/quadrant according to one of the Color Schemes I introduced briefly on Thursday (use a DIFFERENT scheme for each quadrant):

The color scheme options are:

* PRIMARY     * SECONDARY     * TRIAD
* ANALOGOUS     * COMPLEMENTARY     * SPLIT-COMPLEMENT
* WARM     * COOL     * MONOCHROMATIC

*note-- Period 2-- because of the drill, this is all NEW to you-! In the other periods, I spent about 5 minutes going over the various color schemes etc. I have confidence in you though. Read through everything carefully and follow the links and you'll do great! :)


EVERYONE-- You will have TWO DAYS to complete this assignment-- perhaps you will use Friday to come up with your idea and draw it, and decide on the FOUR color schemes you're going to use, and then Monday you'll color it in. Maybe you'll start adding color on Friday. Whatever works! But definitely use your time well on Friday, so you don't run out of time on Monday!

There is a packet of student examples hanging on the board, which you are welcome to look through for inspiration/as EXAMPLES (not to copy...)

More specifically, here are some student examples with comments on what worked well! and/or what was correctly/incorrectly done:

excellently done! An example of the same item, four ways,
colored with four different color schemes:
TOP LEFT: complementary (red/green)
TOP RIGHT: complementary (blue/orange)
BOTTOM LEFT: analogous (red, violet, blue)
BOTTOM RIGHT: complementary (yellow, violet)

the subject of "soup" isn't original, but cleverly spoofed into cans of color scheme soup

creative subject matter-- four different variations on a theme.
Incorrect coloring, though (red+yellow is not a color scheme, plus each quadrant should be different!)

same as the McDonald's one, above... also very well-rendered (drawn), but not colored with Color Schemes

If you lose your Soup Can worksheet, here are the links for PDFs:

TO FIGURE OUT COLOR SCHEMES...

You have interactive Color Wheels and a cheat sheet on each table, the textbook (page references are on the "Basic Color Theory" cheat sheet), and posters on the back wall,  to help you out.

OR, try this site: (CLICK HERE) 
and use this wheel for reference:


THIS PROJECT IS WORTH 20 POINTS!!

YOU WILL TURN IT IN AT THE END OF CLASS ON MONDAY

And...

I will be showing your work to another period... and they will vote on their favorites! (in different categories, like "best use of color", "most original", etc). --For PRIZES, of course!

in other words, MAKE A GOOD EFFORT! :) And, have fun with it! (Yes. Color Theory is a good time haha)

Friday, December 1, 2017

How to save a photo FILE, not a THUMBNAIL...

If your submitted photos are labeled by me as "too small", but you feel you followed instructions on searching/finding the proper image size... it could be you are saving the THUMBNAIL of that image and not the full file.

Let's find out.

1. Are you doing a google search? with proper Size search parameters? If yes, then good. If no, then follow the instructions in the previous blogpost.

2. When a page of images comes up and you see the one you like... DON'T just right-click on it and save it.

 If you do so, you're just saving the THUMBNAIL for that image, which is teeny.


3.Instead, CLICK (or double-click, if you're trigger-happy) on the image that you want. It will open up in a box like this first:


...and then click on the "View Image" button. That will open up the full/real file on a new page, like this:


...and THEN, you can right-click, and save to your folder. Voila! Solved. 

Off-the-Register: PHOTO/IMAGE SEARCH


DUE by MONDAY, DECEMBER 4th... 9 (end of day)

THREE PHOTO IMAGE OPTIONS 
for the 
"Off-the-Register" PROJECT

Here are the instructions/requirements etc as found in class: 
(PDF links of these instructions are at the bottom of the blogpost as well)


PHOTOGRAPHIC IMAGES for the
“OFF THE REGISTER” PROJECT:

what:

Can be virtually anything, as long as it is:

·        appropriate subject matter
·        not a copyrighted image (has a big copyright or X through it, meaning it’s meant to be purchased)
·        a digital file (jpeg) image that can be worked with in Photoshop
·        an image that will work when filtered into black and white or “shades” of gray
·        NOT an animation/cartoon etc… must be a PHOTO
·        a large enough file (so that there are enough pixels to work with when filtering/manipulating)


WHERE TO GET THEM:

Can be photos that you took yourself, OR photos you find online, etc


HoW TO GET FILES OF THE RIGHT SIZE:

In a Google images search…

·        Click on “Search Tools”, then under “Any Size”, select Large or Medium. (but the larger, the better! Large is best)
·        You can also select “Larger than…” and 800x600, MINIMUM… anything smaller won’t filter well!!

SavE FILES AS JPEGS*, (*in your student folder!) THEN EMAIL ... :
*make sure you save the actual file/photo, NOT the thumbnail! (find tips on the next blog post!)

For points and for approval (on subject matter and file size)…
           
·      email to jdoezie@ausd.net
·        in the SUBJECT LINE, put your name and period number
·        ATTACH your THREE images, as jpegs (DON’T copy-paste, DON’T send them copied into a Word/Google doc…!!)
·        CC yourself on the email (if your email doesn’t automatically save sent messages), so you have the images as well!


EMAILED FILES ARE DUE BY MONDAY DECEMBER 4TH

CLASSROOM COMPUTERS MAY BE USED TO SEARCH FOR IMAGES
TWO DAYS ONLY( (((Dec 1 and 4)
after that, you will need to find your images OUTSIDE OF CLASS


Once you have sent in your images and they are approved by me (I will send you a return email with approval/suggestions etc.), FILTER THEM IN PHOTOSHOP to prepare your image to be screen printed!


You will only need ONE filtered image for the project, but you can test out different filters with one or all of the three photos you send to me—maybe only one will work like you want it to, or perhaps you’ll find a bunch of good options that you’ll need to choose from… but with three approved photos, you’ll have plenty to work with! J


you can also access the PDFs HERE

ADDITIONAL TIPS/INSTRUCTIONS are in the next post-- in terms of how to properly save full FILES, not THUMBNAILS-! (a common error :)

Thursday, November 30, 2017

ahhAHH! Shirt Printing!

Did you love Monday's shirt printing demo? (of course) 

Do you love the design of the shirt? (*)

Can you make a peacock sound? (hopefully)

And... would you like to be in the running for the demo shirt ??
 (printed masterfully by yours truly)


then... on Friday (12/1), come and get a shirt lottery ticket from me (really just a small blank piece of paper), walk away and write your name and period number on it, clear your throat, then walk back up to me and give me your best peacock cry as you hand me the paper. And I'll put you in the running. :) (to be awarded on MONDAY to the lucky winner!!!)

*big thanks to BELLE ZHENG, class of 2015, for her extraordinary design! 
I didn't really ask her if I could use it again this year, but I think she'll be okay with it :)

* * * * * *


YAY SHIRTS!

Thursday, November 16, 2017

FINAL WEEKS of FIRST SEMESTER-- Schedule, calendar, and assignment/point info!

You got this in class today! But in case you lose it*, or are hanging out at the mall and suddenly freak out because you don't know what the last day is to turn in your shirt, and you don't happen to have the calendar with you (why would you??), here it is!!


...and, because I know this might be hard to read in jpeg form, and also because you might have lost* your hard copy and need a new one, and because I'm nice, HERE IT IS (CLICK HERE!) in PDF FORM

 (*DON'T LOSE IT! you'll need to record your print days on it, plan your work on it, and turn it in to me later, for points!)


PLEEEEEEEEASE follow the calendar! Plan your time! Don't leave ANYTHING until the last day! No shirts will be printed late (the last day of printing is the last day of printing--12/14), but they could be turned in late! But they shouldn't be! DO YOUR BEST AND DON'T PROCRASTINATE!

Also-- remember that you're going to be presenting your shirt to the class! Which is awesome. Make it something  you're proud to show! :)

Wednesday, November 15, 2017

T-Shirt Factory Outlet directions... also T-shirt selection (in general) directions!

Wondering where to buy shirts? Here's a good suggestion....

T-Shirt Factory Outlet on Google Maps

or, Target. Or Michael's. Or, hey-- the mall. :)

BUT-- your shirt does not have to be new... that's up to you! and long-sleeved, short-sleeved, tank top... also up to you. I don't recommend "ribbed" tank tops however.

Sweatshirts are tougher to print on but doable. Let me know if that's your choice so I can help you!

If you print on fabric that is 50% or more polyester, it may affect the ultimate color of your printed ink. SEE ME if your shirt/sweatshirt is 50/50 cotton/polyester so I can give you some tips!


Monday, November 13, 2017

how to RECLAIM a photo-emulsion screen...


We will spend two class periods learning how to reclaim, because of 1) attention spans; 2) so as not to take up your whole period with a demonstration; and 3) I like to talk :) and explain things fully.

BUT-- when you reclaim YOUR screen, the whole process will probably take you about ten minutes,  once you get it down! :) (as long as you don't have to wait in line for the sinks or table or sprayer etc.)

So, how 'bout you review what you're supposed to do, by reading this blogpost! It'll help.


Here is an abbreviated version of the demo/the instructions...

*First and foremost-- you don't reclaim until the screen is CLEAN (you've cleaned the ink off of it, with water if it's water-based ink, and Bean-E-Doo if it's oil-based), and ... you are FINISHED PRINTING with the stencils on it!

STEP ONE: REMOVE THE EMULSION/STENCIL


Starting with a CLEAN screen...

get screen wet on both sides

--WITH THE SCREEN STILL IN THE SINK (nowhere else!!) spray a good coating of ER (emulsion remover) on both sides

set the screen on either side/counter of the large sink-- print-side up, and flat--
and allow the ER to soak in for a minimum of 4 minutes

After at least 4 minutes, when you are ready to spray out the emulsion, put your screen back in the sink and
turn on the high-pressure sprayer (found under the little sink). Oh, and
SHUT THE DOOR-- the machine is loud (use earplugs if it bothers you!!)

Friday, November 3, 2017

T-Shirt Inspiration! (extra credit opportunity!)


Want to earn (up to) 10 extra credit points? 

this is my t-shirt drawer. Well, one of them. The left side is shirts I've printed, the right side is shirts I've bought
As you learn about t-shirt screen printing techniques in this class, you will start to look at graphic tees differently-- you'll understand how they were made, you'll recognize difficult techniques and registrations, you'll wonder how unique prints were accomplished, and you'll see things you want to emulate (in part! - as in, be INSPIRED. Always create your own original designs to be proud of!)

So... 

THE ASSIGNMENT: (read this whole blogpost for instructions!)

LOOK at the t-shirts that are out there! In stores, that your friends (or strangers! :) are wearing, etc... and notice the ones that you like, that stand out to you. 

FIND four great shirts-- AS IN, graphic tees that are screen printed-- not just a random flannel plaid shirt or something-- 

PHOTOGRAPH them, and  

WRITE a sentence or two for each, of why they are great/why you chose them! 

NOTE: 
the shirts you find/photograph cannot be from your closet. That doesn't inspire you, you already own those shirts! They also cannot be items you find online. Too easy! Again, look in stores, what people around town are wearing, etc. 

ALSO, these four awesome t-shirt examples must fit into the following four categories (you will be finding and photographing one for each category):

1. GREAT SUBJECT MATTER (maybe it's a funny saying, something cool you're into, etc)


Font Conference

...Remember when we watched "Font Fight", in our introduction to Typography? (it was one month ago, today...)

Well, hahaha .... here's another great one!


FOR 3 POINTS EXTRA CREDIT* .... Translate the following:

Pencil telephone hourglass. Diamonds candle candle flag!!! -Mailbox. Mailbox! MAILBOX!!

...

*This is for the "Wanna Earn Some Extra Credit Makeup Points for the October 27th Quiz?" google classroom option! If you are looking at this blog before you check Classroom... make sure you go to Classroom to submit your answer! THIS HAS A DEADLINE...

SUBMIT your translation in the "private comment" section of the Classroom assignment! 


HOW TO CLEAN OIL-BASED INK-- from squeegees, screens, platens, and clothing


By today, everyone has learned the all-important skill of how to clean squeegees of oil-based ink... and I say important not only because you can't print if you can't clean (obvi), but because it's different than water-based ink, as OIL AND WATER DON'T MIX. It's not as simple as rinsing a water-based squeegee of ink. With... water.

Instead-- you've learned how to make oil-based ink WATER-SOLUBLE-- which means "able to be dissolved in water"-- so that it will rinse off your squeegee. As long as you know how to clean squeegees of oil-based ink, you're ready to print with oil-based ink.

You've also been shown which soap to use to remove ink from your skin. Soon, in the (very)-near future, you'll learn:

* how to clean screens of oil-based ink (really it's the same thing, you just have to remove the tape!)

* how to make sparkly-clean platens (yup... it's your job to clean dirty platens! --of ink, of pencil marks, of adhesive buildup, of t-shirt fuzz...)

* what to do if ink gets on your clothes/project. Unwanted ink, I mean.

IN THE MEANTIME, HERE'S ALL THAT INFO! As in, Here are the abbreviated steps of cleaning, plus photos...! Including stuff I haven't taught yet, so that Future You can look back on this post for review. Or so that any overachiever can look at/learn all this ahead of time. (I applaud you!)

oil-based ink is messy. It doesn't dry with natural air temperatures, so it gets everywhere. Blehhh


(*Please remember that I don't expect you to memorize the steps for cleaning; there are posters on the wall in the classroom and clean-up room, to help you when you're cleaning. (And, there's me.). BUT-- it's very helpful to UNDERSTAND it all! Reading all this can't hurt!)


(This is the instruction poster that's on the wall in the Clean Up room. You can look at it 
more closely--or even print out, if you want (?)--by opening a PDF file HERE )
 STEP ONE: put unused clean ink back in tub 
(and scrape off/throw away dirty ink)


Thursday, October 26, 2017

are you using this blog to prep for Friday's quiz?

...If so, congrats! The following information will help you to answer an extra-credit question:

A gallon of emulsion costs $77.25

good luck! :)

Also:

You may use two papers DURING the quiz, to help you figure out the answers:

1. the burning demo worksheet (handed back Thursday)
2. your First Print Practice handout

...If you don't have one or both of those, and/or you want more info to help you understand concepts-- here are items that will help you study! The (correct answers to burning demo questions,) and the previous blogposts on burning (part ONE, part TWO, part THREE (incl. how to prep a burned screen)), the posts on printing (part ONE, and part TWO which includes how to clean) and you'll be just fine.

Friday, October 20, 2017

PRINTING WITH OIL-BASED INK-- demo review, practice assignment, and how to print light onto dark!


In yesterday's 20-minute OIL-BASED INK demo, you learned some of the differences between oil-based and water-based ink, the main one being that oil-based ink requires HEAT to dry/cure fully, which affects a lot of different things:

* printing 

* clean-up 

* classroom cleanliness!

etc etc etc etc etc


Things I mentioned during the demo (and which were listed on the board)
---------------------------------------------------------------------------------------------
PRINTING ON A T-SHIRT REQUIRES:

1. Specific layouts when burning a screen (where you expose the stencils)

2. Different registration steps

3. Special techniques when printing LIGHT ink onto DARK fabric, including use of the "FLASH DRYER" (!) (so exciting!! :)

4. Different CLEANING steps-- NO OIL SQUEEGEES IN THE SINK! etc etc etc etc etc 
---------------------------------------------------------------------------------------------

,,, #s 1, 2, and 4 are things we'll discuss/learn another day.

TODAY, I showed you #3-- what YOU will do to PRACTICE printing with oil-based ink, on t-shirt fabric. Actually, a piece of a "test square", which is basically fake fabric that printing companies use for their t-shirt test prints... but it's similar to fabric. Mostly.

Anywayyyy....

 info, review, and highlights...

1. You will practice printing oil-based ink with your LARGE VELLUM stencil. By that, I mean the stencil on your screen that was created from the large vellum positive of your sticker design. Mask off EVERYTHING on your screen (on the squeegee-side!) except for the Large Vellum stencil. TRUST ME! This will enable you to print two stencils, with different inks, without having to clean your screen in-between. Oil-based ink doesn't dry out--  you can leave ink on your screen and clean it another day-- and if you mask-it off correctly, you can print different colors without having to clean in-between! You'll see :). (I'll demonstrate this as prep before you do 'foil transfer printing')

a screen fully masked-off to print one stencil and keep the rest of the screen "clean"

2. Oil-based ink squeegees have a softer blade than the ones we use for water-based ink. You can identify them by their color: dark blue for water-based, and yellow (or sometimes green) for oil-based. DON'T MIX THEM UP!

for now, or any time when some students are working with water-based ink, make sure you are using the correct one! 


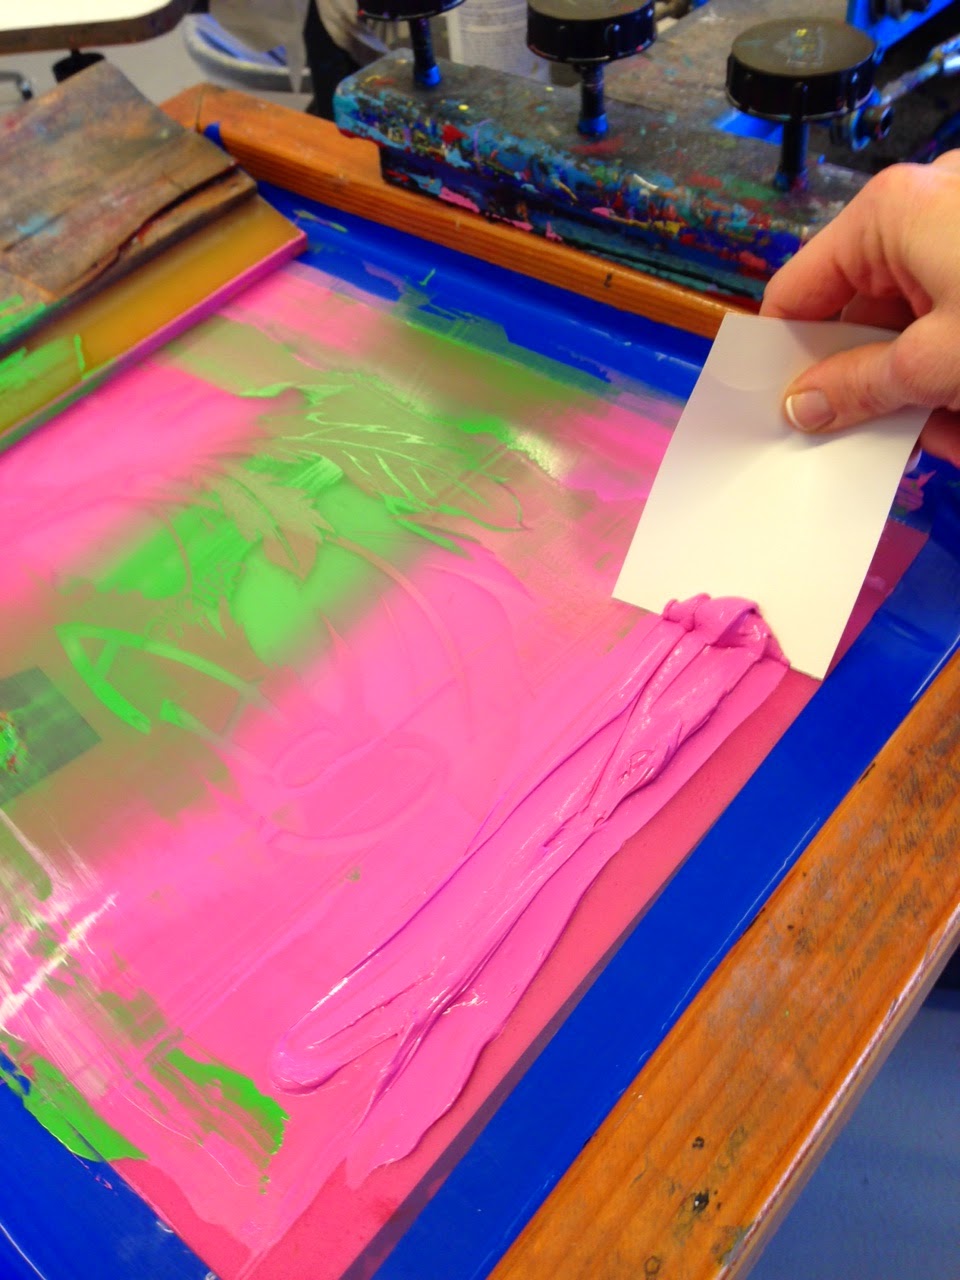
3. Oil-based ink is easier to work with because it doesn't dry naturally, but a massive pain because of this, too-- because if it gets on a surface, it STAYS WET and will transfer onto another surface if touched-- like your hands, your substrate, and even your clothes. I'll show you how to (hopefully) get unwanted ink out of clothes/fabric substrates later, but if it gets on your skin while printing, etc, USE THE POWDERED SOAP IN THE SILVER DISPENSER. It's fantastic. It's called Boraxo, and gets most ink off of your skin, but especially oil-based (which isn't really affected by normal, liquid soap)


4.  Oil-based ink is thicker than water-based. Some are extremely thick (depends on the color). You will use a craft stick to SCOOP out the ink from the tubs and put it on the screen (whereas you poured out the water-based ink, from jars, using the stick to help guide the ink).


5. You will first practice oil-based ink by printing three different ways on a piece of t-shirt "fabric". Instructions are up on the board, but the gyst of it is this:

FIRST PRINT (left, on the above example):
Just one pull. Dry the ink in the conveyor dryer. The ink won't be completely opaque (if printing on a light substrate), and may look slightly faded (if printing on a dark substrate). This is because, when using oil-based ink, the first pull does not (usually) release all the ink from the stencil. It can be a desired, 'distressed'/worn look, but generally, you always want to make TWO strong pulls. So:


SECOND PRINT (middle, on the above example):
Make two strong pulls. (Remember-- NO BACK-FLOODING!) This will release all the ink from the stencil and make the ink more opaque than before. If you need to make a third pull, do so. Dry the ink in the conveyor dryer.


THIRD PRINT (right, on the above example):
Make two/three strong pulls, flash-dry, THEN print another layer, then put the whole thing through the conveyor dryer..

WHY??

If  you're printing light ink on a darker fabric, the ink won't be opaque/true to color unless you flash-dry between layers. This is because the ink will just keep soaking through the fabric, it won't build up/get thick/be opaque (unless you're not printing correctly and the ink prints too thickly.
If, however, you FLASH-DRY after your first (two) pulls, this surface-dries the ink so that the next pull/layer will sit on TOP of that ink, and give it the desired opacity.

some inks are naturally more opaque than others, and you might not want/need to flash-dry
between layers when printing your project(s)

FLASH-DRYING is easy-- just requires placing the flash-dryer over your substrate, on the platen, for 30 seconds or so, until the ink is dry to the (careful) touch.

the DIFFICULTY comes in printing the next layer, after flash-drying...

you have to CHECK TO MAKE SURE THE SCREEN LINES UP WITH THE PRINTED INK, before you pull another print! If it doesn't line up PERFECTLY, in all areas of the stencil, you will end up printing a DOUBLE-IMAGE. Which very, very rarely actually looks good.


HOW DO YOU PREVENT THIS?

*1. make sure nothing moves, BEFORE you start printing: the screen should be tight, the platen tight, and the fabric substrate WELL-ADHERED with the red platen adhesive

*2. After flash-drying the first layer, CHECK to make sure the stencil lines up with the print, by lowering the screen and carefully pushing on the screen (like when you check the off-contact), to see if it lines up. Check ALL areas of the stencil.

*3. IF IT DOESN'T LINE UP PERFECTLY... figure out what moved. If it was the screen or platen, you can probably move it back into place. 

*4. IF IT DOESN'T LINE UP PERFECTLY BECAUSE THE SUBSTRATE MOVED... Game over. Just have a less-opaque print, it'll be fine. DON'T PRINT THE NEXT LAYER IF IT DOESN'T LINE UP! *ALSO*-- get Miss Doezie for help before you give up, OR if you are unsure if it's lining up correctly.


*******************

AFTER YOU HAVE PRINTED,  CLEAN YOUR SQUEEGEE 

(cleaning instructions will be given a different day, before anyone starts printing. But if you're from the future and looking back, read on!)

**************************************
Follow instructions given for cleaning (more detailed instructions are found HERE)
You MUST clean your squeegee the same period you use it, so it's available for the next student's use.

You do NOT have to clean your screen right away, as the oil-based ink won't dry, BUT-- you DO need to scrape off the excess/usable ink and put it back in the tub (so it doesn't get gunky from the dust in the air)

And, for this practice exercise, DON'T clean your screen until you've printed the Foil Transfer as well... so that you can practice color-switching without cleaning.

REMINDERS...
Bean-E-Doo makes oil-based ink water-soluble


instructions for cleaning are on the walls of the classroom and the sink room


FOLLOW ALL POSTED SIGNS!!! 


Friday Treat Challenge!!


Want one of these??


Then, as a follow-up to the Wednesday College Shirt Day discussion...

 be one of the first TEN* to properly identify at least THREE of these five famous people who attended Miss Doezie's university! (BYU) 

Answer what it asks below... Write answers down on a piece of scratch paper! GOOD LUCK!!

*if only five people come up, you'll split the ten cookies! :) so... DON'T TELL ANYONE ELSE ABOUT IT! Either they read the board, or they didn't! And don't tell other classes!! 

#1
(the actor's name, and the name of this character!)


#2

(the name and which political party!)


#3
(the athlete and the name of the football team!)


#4
(the author of the series and how many books in the series!)


#5
(the actor's name, and the name of this movie!)