
By today, everyone has learned the all-important skill of how to clean squeegees of oil-based ink... and I say important not only because you can't print if you can't clean (obvi), but because it's different than water-based ink, as OIL AND WATER DON'T MIX. It's not as simple as rinsing a water-based squeegee of ink. With... water.
Instead-- you've learned how to make oil-based ink WATER-SOLUBLE-- which means "able to be dissolved in water"-- so that it will rinse off your squeegee. As long as you know how to clean squeegees of oil-based ink, you're ready to print with oil-based ink.
You've also been shown which soap to use to remove ink from your skin. Soon, in the (very)-near future, you'll learn:
* how to clean screens of oil-based ink (really it's the same thing, you just have to remove the tape!)
* how to make sparkly-clean platens (yup... it's your job to clean dirty platens! --of ink, of pencil marks, of adhesive buildup, of t-shirt fuzz...)
* what to do if ink gets on your clothes/project. Unwanted ink, I mean.
IN THE MEANTIME, HERE'S ALL THAT INFO! As in, Here are the abbreviated steps of cleaning, plus photos...! Including stuff I haven't taught yet, so that Future You can look back on this post for review. Or so that any overachiever can look at/learn all this ahead of time. (I applaud you!)
.JPG) |
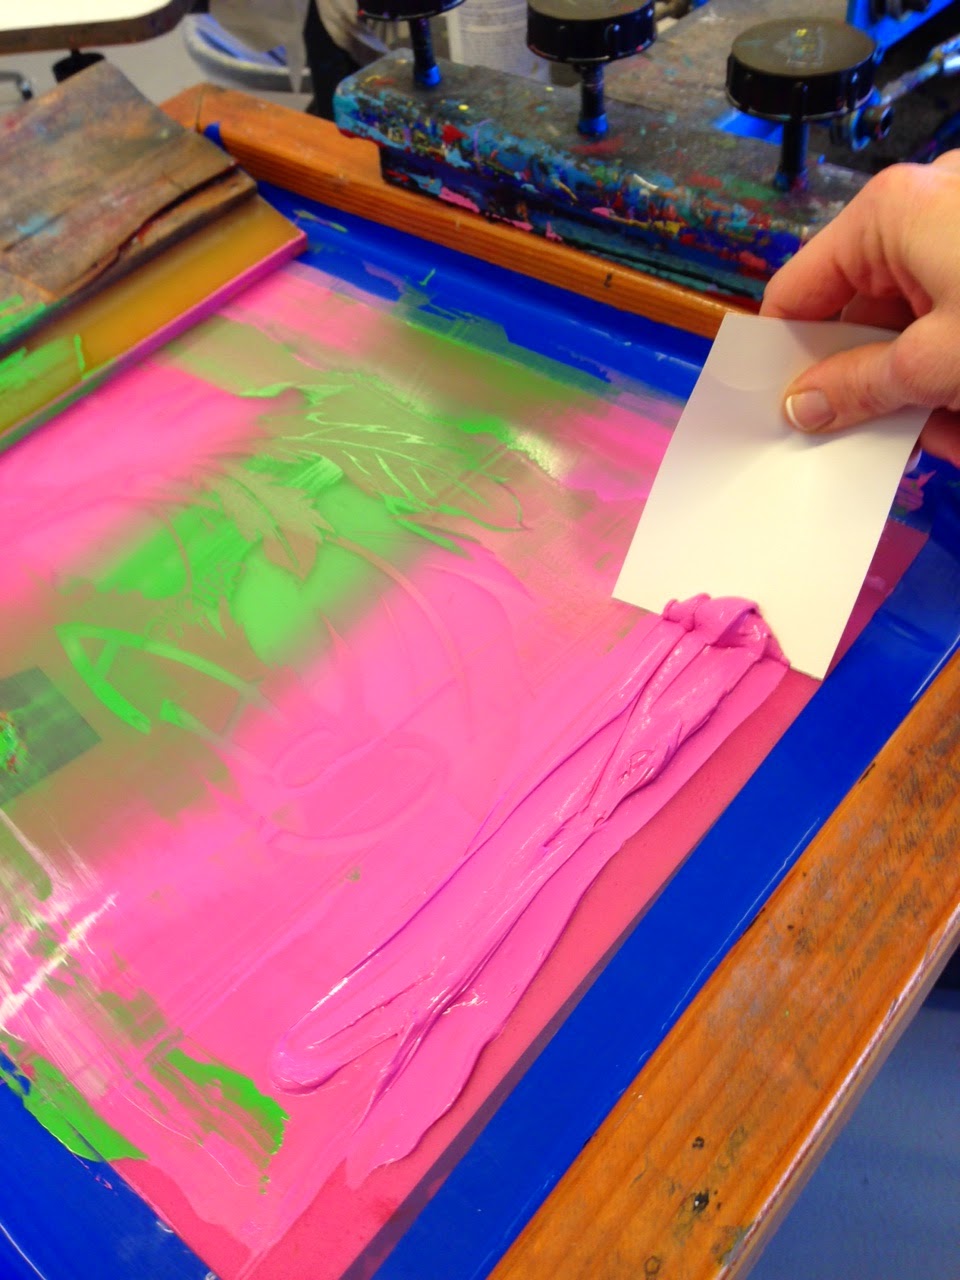
| oil-based ink is messy. It doesn't dry with natural air temperatures, so it gets everywhere. Blehhh |
(*Please remember that I don't expect you to memorize the steps for cleaning; there are posters on the wall in the classroom and clean-up room, to help you when you're cleaning. (And, there's me.). BUT-- it's very helpful to UNDERSTAND it all! Reading all this can't hurt!)
(This is the instruction poster that's on the wall in the Clean Up room. You can look at it
more closely--or even print out, if you want (?)--by opening a PDF file HERE )

STEP ONE: put unused clean ink back in tub
(and scrape off/throw away dirty ink)


STEP TWO: remove tape


(NO SPIDERWEBBING!!!)

STEP THREE: wipe off excess ink with paper towel
(this step HELPS your overall cleaning process, I promise!)
(no photo for this one. Sorry. But I think you can figure it out)
The first three steps can be done outside the clean-up room.
Now for the rest...

STEP FOUR: add bean-e-doo


STEP FIVE: scrub the bean-e-doo into the ink
 |
| use the correct sponge!!! |
 |
| my hair looked fantastic in this photo. As usual. |


STEP SIX: rinse off the bean-e-doo/ink mix
(it's water-soluble now; meaning, it can mix/dissolve with water)


STEP SEVEN: wipe off the cleaning table
and rinse the bean-e-doo sponge


 |
| rinse and squeeze out the big nasty sponge after using |
 |
| rinse out the Bean-E-Doo sponge! Just hold it under the water |
 |
| the sponges drain on the |
Then... put your squeegee in the rack to dry

* * * * *
SOME OTHER TIPS/CAUTIONS/NO-NOs....

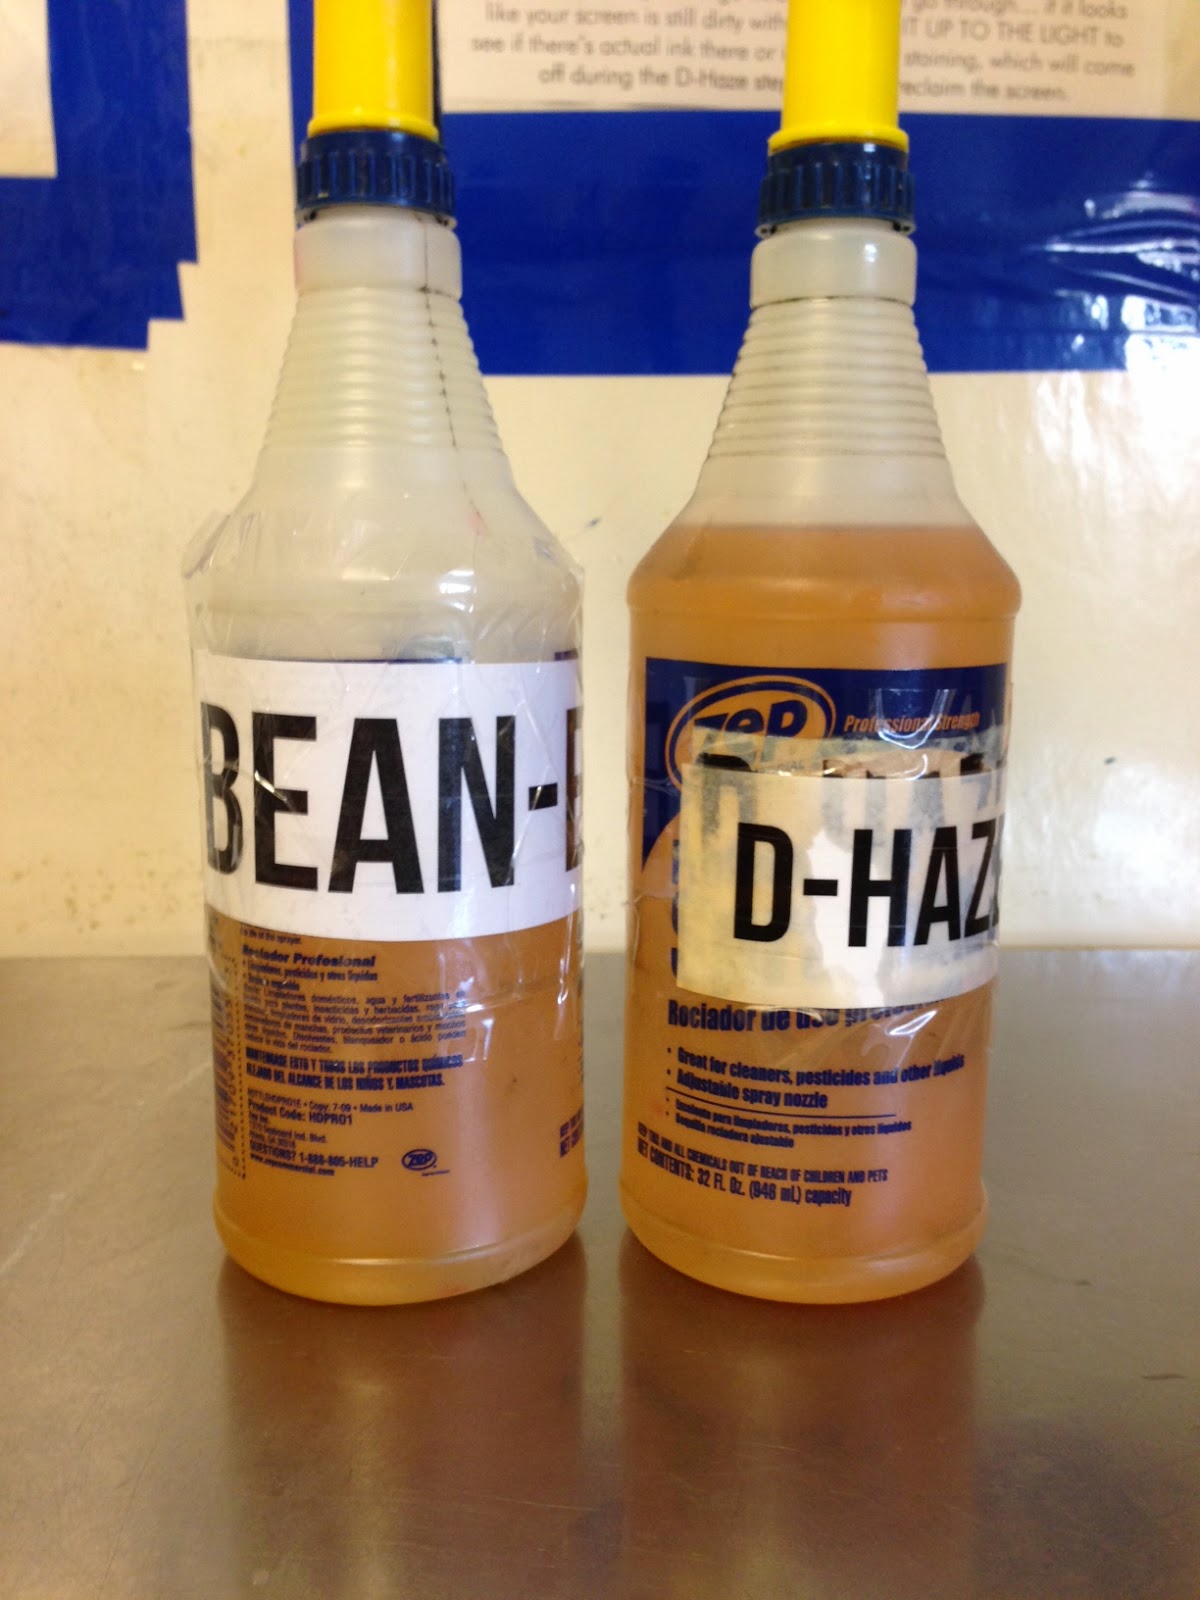
Some solvents look similar. Make sure you are using the correct solvent for the task! (Bean-E-Doo for cleaning, and --you'll learn in the future-- "D-Haze", for reclaiming)
 |
| this is where the spray bottles live, sometimes. Depending on you guys, of course. |

Make sure you use the right sponge with each solvent

and remember that the white sponge doesn't stay white forever... but it's clearly NOT the red sponge

 |
| this is where the red sponges live. They do not get inky/oily and very rarely need to be rinsed |
 |
| this is where the white sponges and the Big Nasty Sponge live. They need to be rinsed CONSTANTLY |

NO SQUEEGEES IN THE LITTLE SINK!
and
NO "handle" (red/white) SPONGES IN THE BIG SINK!!

 |
| READ THE SIGNS!!! |
If you are waiting to clean your squeegee of oil-based ink, do NOT PUT IT IN A SINK!!!
 |
| NO NO NO NO NO NO NO NO NO |
Instead, set it on a piece of newsprint, or even on the cleaning table in the clean-up room
(don't forget about it!)

|
| PUT THE INK BACK WHERE YOU FOUND IT!! It helps everyone, when supplies are kept in order *Always handle ink with newsprint (and set it down with newsprint under it). This will keep your hands-- and everything else-- a lot cleaner. Not PERFECTLY clean, that's ridiculous, but - better :)  |
************
CLEANING PLATENS, CLOTHING, & SKIN
If you get ink on a platen, DO NOT USE BEAN-E-DOO to clean it...
You'll use Platen Cleaner (aka Ickee-Stickee-Unstuck... not a name I came up with).

The platen cleaner (ICKEE STICKEE UNSTUCK) is found in the cupboard under the classroom sink.
DIRECTIONS for using it are posted on the bulletin board above that sink. FOLLOW THEM!
You would need to clean a platen if:
1. You got oil-based ink on the platen
2. You dirty the platen with excessive shirt fuzz/lint, lots of pencil marks, newsprint stuck with too much platen adhesive, etc
3. You're printing a white/light shirt and want to make sure the platen is totally clean first!
4. You feel like cleaning it, because it's just too dirty or you don't like numerous pencil marks
*If you get OIL-BASED INK on a platen while printing, you can (often) blot or wipe off the excess ink with a paper towel or newsprint, and then clean it with the platen cleaner after you're done.
* If you get WATER-BASED ink on a platen, wipe it off immediately with a wet paper towel, before it dries! If you wait until it dries, you'll have to use the platen cleaner.
*If you get ink on your hands/skin... Use the BORAXO POWDERED SOAP (found above the classroom sink in a silver container). It works the best! (I'll demo on Thursday)
*If you get ink on your clothes... Use BEAN-E-DOO, following the steps I will show you in the near future. If you forget how, COME ASK ME! Don't risk ruining your clothes (or project) by attempting it with the wrong steps!
ONE LAST TIP... (the last thing on the cleaning posters...)
*If you get ink on your clothes... Use BEAN-E-DOO, following the steps I will show you in the near future. If you forget how, COME ASK ME! Don't risk ruining your clothes (or project) by attempting it with the wrong steps!
ONE LAST TIP... (the last thing on the cleaning posters...)

REMEMBER- IF YOU DON'T FOLLOW THESE STEPS FOR CLEANING, YOU CAN BE PENALIZED ONE FULL LETTER GRADE ON YOUR PROJECT! (which can be a lot of points!) Cleaning is part of the whole process, AND if done incorrectly, can be damaging to a lot of things, in a lot of ways. Including my sanity. Which is maybe almost the most important part. :)