

We will spend two class periods learning how to reclaim, because of 1) attention spans; 2) so as not to take up your whole period with a demonstration; and 3) I like to talk :) and explain things fully.
BUT-- when you reclaim YOUR screen, the whole process will probably take you about ten minutes, once you get it down! :) (as long as you don't have to wait in line for the sinks or table or sprayer etc.)
So, how 'bout you review what you're supposed to do, by reading this blogpost! It'll help.
Here is an abbreviated version of the demo/the instructions...
*First and foremost-- you don't reclaim until the screen is CLEAN (you've cleaned the ink off of it, with water if it's water-based ink, and Bean-E-Doo if it's oil-based), and ... you are FINISHED PRINTING with the stencils on it!
STEP ONE: REMOVE THE EMULSION/STENCIL
Starting with a CLEAN screen...
 |
| get screen wet on both sides |
 |
| --WITH THE SCREEN STILL IN THE SINK (nowhere else!!) spray a good coating of ER (emulsion remover) on both sides |
 |
| set the screen on either side/counter of the large sink-- print-side up, and flat-- and allow the ER to soak in for a minimum of 4 minutes |
 |
| After at least 4 minutes, when you are ready to spray out the emulsion, put your screen back in the sink and turn on the high-pressure sprayer (found under the little sink). Oh, and SHUT THE DOOR-- the machine is loud (use earplugs if it bothers you!!) |
 |
| To turn on the sprayer: turn on the water FIRST, by pushing the blue lever down so it's horizontal/aligned with the hose |
 |
| then turn on the POWER, by gently pressing the (now-broken) switch |
 |
| squeezing the trigger with full force, spray the dissolving emulsion from the PRINT side (because the emulsion is coated on the squeegee-side) |
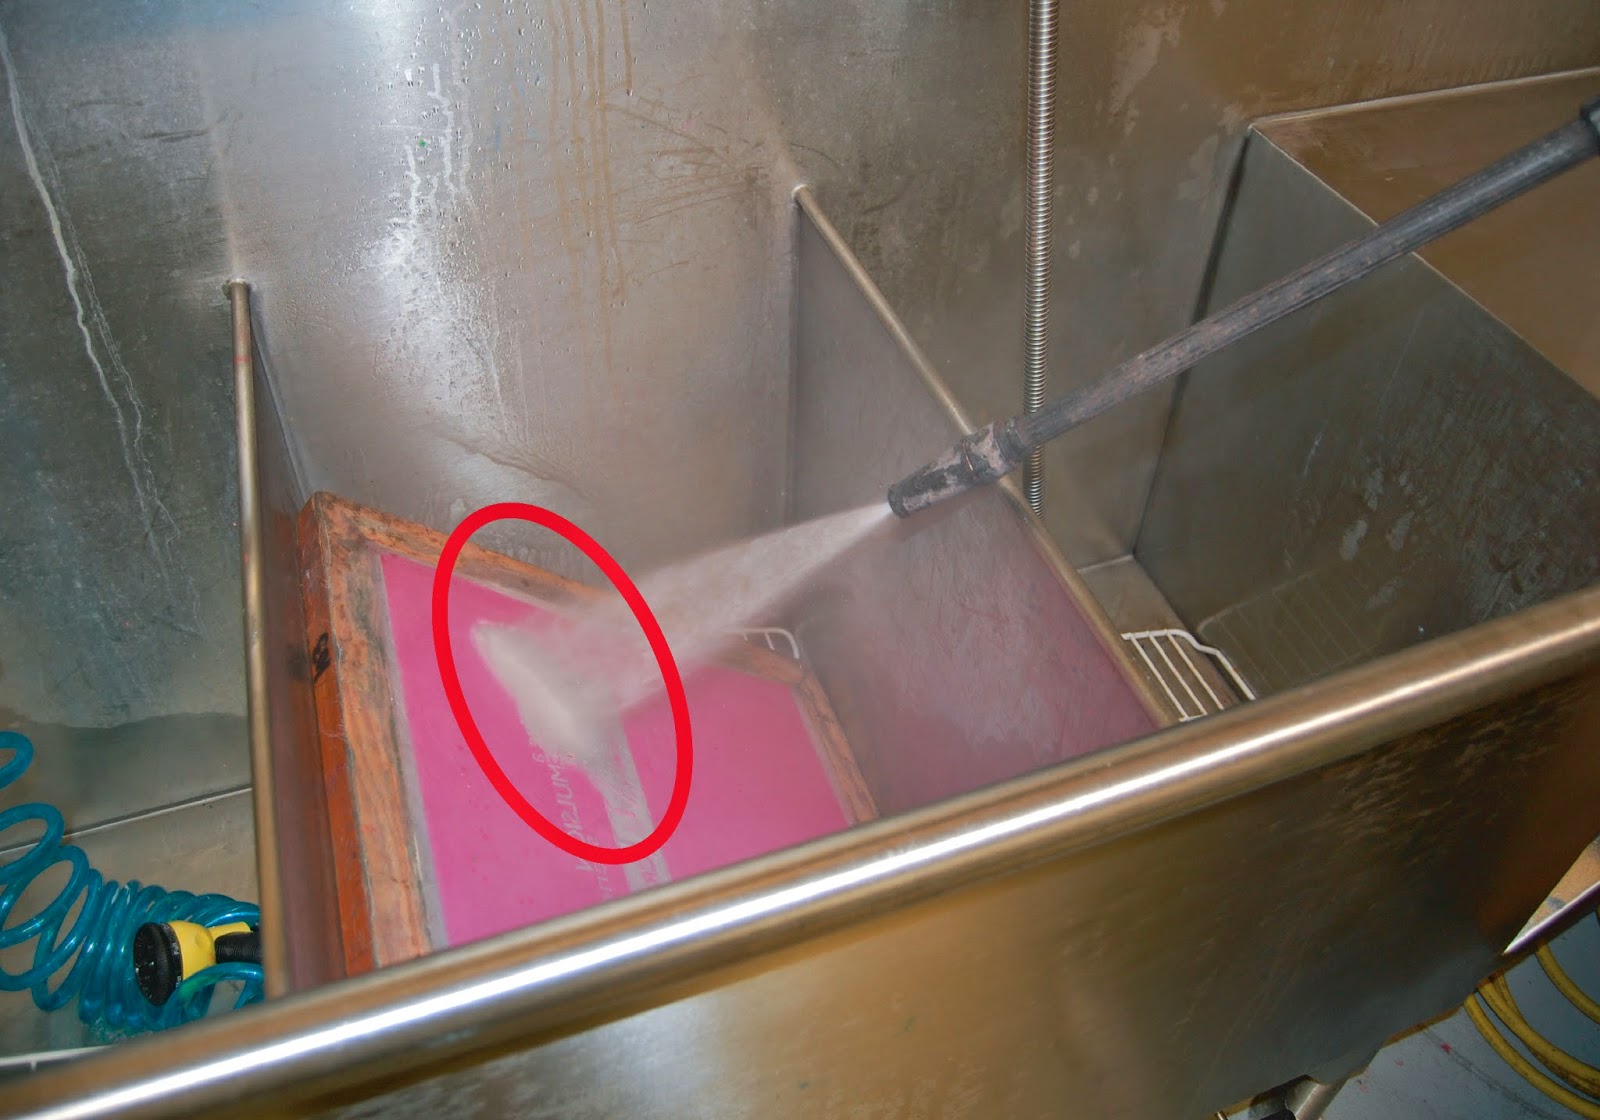 |
| holding the nozzle a distance away from the screen will give you a wider swath of nozzle from the water, so you can clear the screen more quickly |
 |
| move the spray back and forth across the screen to remove all of the emulsion |
 |
| if there are stubborn spots that don't seem to come off like the rest, they are likely pin-hole fixes on the print side. Turn the screen around and spray from the squeegee-side to remove them |
 |
| immediately after you've finished spraying, turn the high-pressure sprayer off by FIRST turning off the power, |
 |
| then pulling the level back up to the vertical position, to turn off the WATER |
 |
| lastly, squeeze the trigger to release excess water from the (old) hose so it doesn't leak onto the floor |
(These next two steps of reclaiming can be done the following day if necessary)
 |
| damp-dry the screen with a little paper towel. If the screen is already dry because you did Step 1 the day before, all the better!! (D-Haze works best on a dry screen) |
 |
| place the screen on the metal cleaning table and spray a little D-Haze onto the stained and/or ghost-imaged area(s) (DON'T USE A LOT! it's very strong and can harm the frame!) |
 |
| using the RED SPONGE, ON THE TABLE, scrub the D-Haze into both sides of the screen until the ink stains seem to dissolve. You may have to let it soak in for awhile and then scrub some more, depending on how stubborn the stains are. |
 |
| put the screen back in the sink and rinse out the D-Haze. If you find that you've missed an area, go back and do the D-Haze steps again (starting with damp-drying the screen) |
 |
| After you've rinsed out the D-Haze, keep your screen in the sink for the degreasing step. If you degrease the next day, put your screen in the sink and get it wet again. The supplies you need for this-- the Simple Green spray bottle and the BLUE sponge-- are on one of the sink counters. |
 |
| spray a little Simple Green onto both sides of the water-wet screen |
 |
| using the BLUE sponge do a quick scrub on both sides, using the dark/rough side of the blue sponge (THIS IS THE ONLY SPONGE THAT SHOULD EVER BE IN THE LARGE SINK!) |
 |
| then rinse. Simple Green smells awesome. |
 |
| put your very wet screen in the bottom of a rack to dry, or let it dry outside until it's not dripping and then put it anywhere in a rack, or if you're in a hurry because you need it re-filled with photo-emulsion, you can use the air compressor to dry it quickly.. but no matter what, do NOT use paper towels to dry it, and it needs to end up in a rack by the end of the period! :) |
Annnnnndddd....
Here are the reclaiming instructions, as posted on the wall:


And here are the High-Pressure Sprayer instructions as posted near the High-Pressure Sprayer:
